11 min read
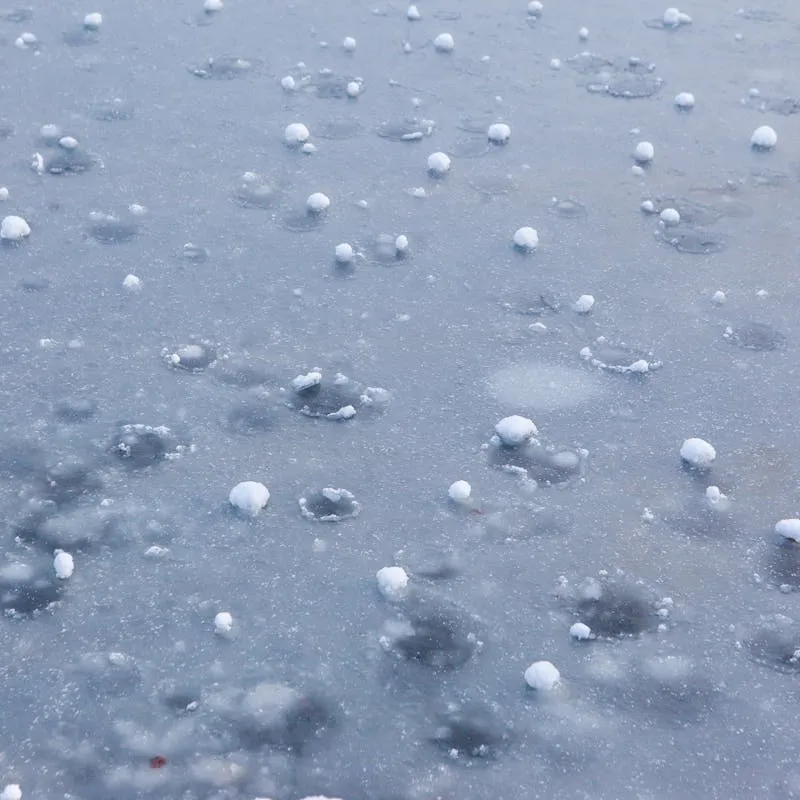
Perth doesn’t cop hailstorms as frequently as Sydney or Melbourne, but when they hit, they can be devastating. The Perth hills and eastern suburbs are particularly prone to severe convective storms in late spring and summer, and a single event can damage hundreds of roofs in a suburb within minutes.
The problem is that hail damage isn’t always obvious. A roof can sustain significant damage that doesn’t cause an immediate leak but compromises the roof’s protective coating and integrity - leading to accelerated deterioration and problems down the track. Knowing what to look for, how to document it, and when to act can save you thousands of dollars.
How Common Is Hail in Perth?
Perth sits in a zone that experiences hail-producing thunderstorms primarily between October and March. The storms are typically short-lived but intense - driven by the same convective heating that produces Perth’s afternoon sea breezes.
Severe hailstorms (hailstones 2 cm or larger) affect parts of the Perth metro area every few years. The eastern suburbs, hills zone, and areas around the Darling Scarp are more frequently affected because the topography helps trigger storm development.
Notable recent events have produced hailstones the size of golf balls and larger, causing millions of dollars in damage across affected suburbs. Even a moderate hailstorm with 1-2 cm hailstones can damage aging or already-compromised roof surfaces.
The key fact: you don’t need golf-ball-sized hail to damage a roof. Hailstones as small as 1.5-2 cm can crack concrete tiles, chip protective coatings, and dent thin metal roofing - particularly if the roofing material is already aged and brittle.
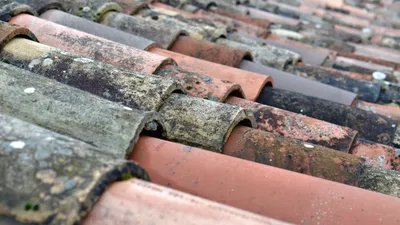
What Hail Damage Looks Like on Concrete Tiles
Concrete tile roofs are the most common in Perth, and they respond to hail impact in several characteristic ways:
Chips and Divots
The most common form of hail damage on concrete tiles. The hailstone impacts the tile surface and knocks off a small chip of the coating and sometimes the underlying concrete. These chips are typically circular or semi-circular, ranging from 5 mm to 20 mm in diameter depending on the hailstone size.
Fresh chips will show the lighter-coloured raw concrete underneath the coating. Over time, these uncoated spots absorb moisture, grow moss and lichen, and become darker than the surrounding tile.
Cracks
Larger hailstones can crack tiles outright, particularly older tiles that have become brittle with age. Hail-induced cracks can be:
- Impact fractures - radiating out from the point of impact, similar to a cracked windshield
- Through-cracks - the tile breaks completely across its width or length
- Hairline cracks - not always visible from a distance but detectable on close inspection
Dislodged Surface Coating
Even where the tile body isn’t cracked, the impact force can shatter and dislodge the factory coating. This leaves the porous concrete exposed to moisture absorption, UV degradation, and biological growth. The tile may look intact from the ground but has lost its protective surface.
Ridge Cap Damage
Ridge caps (the shaped tiles along the roof peaks) are particularly vulnerable because they sit proud of the roof surface and cop hail from multiple angles. Look for chips, cracks, and dislodged pointing compound along the ridge lines.
What Hail Damage Looks Like on Metal Roofs
Colorbond and other metal roofs respond differently to hail:
Dents
The classic hail damage on metal. Hailstones compress the metal sheet, leaving circular or oval dents. The size and depth of the dents corresponds roughly to the hailstone size.
Small dents (from hailstones under 2 cm) may be barely visible from the ground but clearly visible when viewed at an angle with light raking across the surface.
Large dents (from hailstones 3 cm+) are obvious and can compromise the structural rigidity of the sheet, particularly in the flat pan areas between the ribs of a corrugated or Trimdek profile.
Paint Damage
The impact can crack, chip, or fracture the factory paint coating - even if the metal underneath isn’t significantly dented. This breaks the protective barrier and allows moisture to reach the steel surface, initiating corrosion.
Look for small spots where the colour appears different (lighter or darker), or where tiny rust spots have formed in a pattern across the roof surface.
Scratched Coating
Hailstones often hit at an angle, not straight down. This can scrape across the paint surface, leaving scratch marks that remove the coating in a line. These scratches may not be visible from the ground but can be felt by running a hand across the surface.
Damaged Flashings and Gutters
Metal flashings, valleys, and gutters are thinner gauge material than roof sheets and are more susceptible to denting. Check gutters for a pattern of dents - this is often the easiest place to confirm hail damage from ground level.
How to Check From Ground Level
You don’t need to climb on your roof to do an initial assessment after a hailstorm. Here’s what to check from the ground:
Gutters and downpipes. Walk around the house and look at the gutters. Hail dents in gutters are easy to spot from below. If the gutters are dented, the roof above almost certainly is too.
Windowsills and capping. Metal window frames, air conditioning units, and any other exposed metal on the house can show impact marks.
Fence tops and letterbox. Painted metal surfaces at ground level show hail impacts clearly. If your Colorbond fence is dented, the roof would have copped the same.
Car damage. If vehicles parked outside during the storm have dents, the hail was severe enough to damage roofing.
Roof surface from a distance. Look at the roof from across the street. With binoculars, you can often see chip marks on tiles (they’ll appear as lighter spots on a darker roof) or the shadow patterns of dents on metal.
Debris on the ground. After a hailstorm, check the ground around the house for tile chips, fragments of coating, or pieces of pointing compound that were knocked off by hail impacts.
What a Professional Sees Up Close
A ground-level check gives you a general indication, but the real assessment happens on the roof. A professional roof inspection after a hailstorm includes:
Systematic survey. Walking the entire roof (carefully, to avoid adding foot traffic damage), checking every plane and feature. Hail often affects different parts of the roof differently based on the storm’s direction.
Close-up tile inspection. Checking individual tiles for chips, cracks, hairline fractures, and coating damage. Some damage is invisible from more than a metre away.
Impact testing. Tapping tiles to listen for a change in sound - cracked tiles produce a dull thud instead of a clear ring. This picks up cracks that aren’t visible on the surface.
Coating assessment. Checking whether the tile or metal coating has been compromised in areas that aren’t visibly chipped. Impact force can damage the coating bond without leaving an obvious mark.
Ridge and hip inspection. Checking all ridge caps, hip caps, and the pointing compound for storm damage.
Flashing and penetration check. Inspecting every flashing, valley, vent, and pipe penetration for dents or displacement.
Documentation. Photographing all damage with close-up shots, wide shots showing location on the roof, and notes on the extent and severity. This documentation is critical for insurance claims.
Hail Damage vs. Normal Wear: How to Tell the Difference
Insurance assessors and adjusters need to distinguish between storm damage (which is covered) and normal wear and tear (which isn’t). Here’s how they’re different:
Hail Damage Indicators
- Random pattern - damage scattered across the roof without following any structural or drainage pattern
- Consistent directionality - damage worse on the side of the roof facing the storm, lighter or absent on the sheltered side
- Matching damage on other surfaces - gutters, fences, sheds, and cars showing similar impact marks
- Fresh appearance - chips show clean, light-coloured exposed concrete or bright metal rather than weathered surfaces
- Circular impact marks - the chip or dent shape is roughly circular, matching a spherical hailstone impact
- Neighbours affected - hailstorms affect areas, not individual houses
Normal Wear Indicators
- Gradual, even deterioration - coating wearing thin consistently across the roof
- Pattern follows structure - wear worse in areas of water flow (valleys, bottom edges) or UV exposure (north face)
- Age-consistent - the level of wear matches what you’d expect for the roof’s age
- No sudden onset - the deterioration has been progressing over years, not appearing after a specific event
- No matching damage elsewhere - the house, gutters, and surroundings don’t show impact marks
An honest roofer will tell you the difference. Be wary of anyone who shows up unsolicited after a storm claiming your roof needs major work - storm-chasing operators are a well-known problem in the industry.
Documenting Damage for Insurance
If you believe your roof has hail damage, proper documentation is essential for a successful insurance claim:
Act quickly. Most insurance policies require you to report damage “as soon as reasonably practicable.” Don’t wait weeks.
Photograph everything. Take photos from ground level showing the overall condition, and close-ups of specific damage. Include photos of damaged gutters, fences, and other surfaces that corroborate the hail event.
Note the date and time of the storm. Your insurer will verify this against Bureau of Meteorology records.
Don’t make permanent repairs before the assessor visits. Temporary repairs to stop active leaks are fine (and expected), but don’t replace tiles or repaint metal before the damage is documented by the insurer or their assessor. Photograph temporary repairs as you make them.
Get a professional roof inspection report. A written report from a qualified roofer documenting the type, extent, and location of damage carries far more weight than homeowner photos alone.
Keep receipts for any emergency work. Tarps, temporary patch materials, and emergency call-out fees are typically claimable.
Time Limits on Insurance Claims
This catches many homeowners out. Most home insurance policies have time limits on claims - typically you must notify the insurer within a reasonable time of the event. While “reasonable” is flexible, reporting damage 6-12 months after a storm significantly weakens your claim.
Even more importantly, if you discover damage well after the event, it becomes harder to prove the damage was caused by hail rather than normal aging. The fresh appearance of impact marks fades over time - chips weather, exposed metal starts to rust, and the distinction between hail damage and wear becomes blurred.
Best practice: Inspect your roof after any significant hailstorm and report damage promptly. Even if you’re not ready to make a claim or arrange repairs immediately, getting the damage on record with your insurer preserves your position.
Emergency Steps After a Hailstorm
If a severe hailstorm has hit your area:
Check for active leaks inside the house. Look at ceilings for water stains, drips, or bulging plaster. Place containers under any active leaks.
Do a ground-level external check. Walk around the house looking for obvious tile fragments, gutter damage, or displaced roof components.
Check ceiling cavity access. If you can safely access your ceiling cavity (from a manhole inside the house, without going on the roof), look for daylight coming through - this indicates cracked or displaced tiles.
Don’t climb on the roof. After a hailstorm, tiles may be loosened or cracked and the roof surface may be slippery from water and ice. Leave the roof inspection to a professional.
Contact your insurer. Report the potential damage even before you have a full assessment. You can provide details later.
Arrange a professional inspection. Contact a roofing company to inspect and document the damage. Be aware that after a major hailstorm, roofers are overwhelmed with calls - it may take a few days to get an inspection scheduled.
Be cautious of door-knockers. After major hail events, unlicensed operators go door-to-door offering cheap repairs. Use only licensed, insured roofing contractors. Check their credentials before agreeing to any work.
The Bottom Line
Hail damage to roofs is more common in Perth than many homeowners realise, and it doesn’t always make itself immediately obvious. A roof can sustain hundreds of small impacts that don’t cause leaks today but compromise the protective coating and accelerate deterioration over the following years.
The time to check is right after a hailstorm - not months later when the damage has weathered and become harder to distinguish from normal wear. A prompt inspection, proper documentation, and timely insurance notification give you the best chance of getting the damage addressed before it turns into a bigger problem.
If you’ve been through a recent hailstorm and haven’t checked your roof, it’s worth getting a professional roof inspection done while the evidence is fresh, with a documented report for your insurer. Get a free quote online.


 Licensed
  Fast Response
