6 min read
If you’ve never had a roof restoration done, the process can seem mysterious. Trucks show up, people go on your roof for a few days, and somehow your old, tired roof looks brand new.
But there’s a specific, methodical process behind every professional roof restoration. Understanding it helps you know what to expect, ask better questions when getting quotes, and recognise quality work from cut corners.
Here’s exactly what happens, step by step.
Step 1: Inspection and Assessment
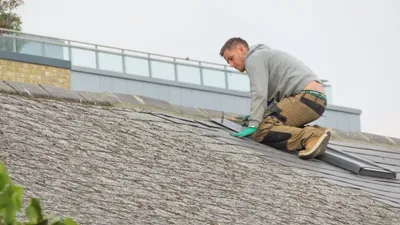
Before any work begins, a professional inspection identifies every issue that needs addressing. This typically includes:
- Walking the entire roof surface, checking tiles, sheeting, and fixings
- Examining ridge capping, pointing, and bedding
- Inspecting valleys for rust or damage
- Checking flashings around all roof penetrations
- Assessing gutters and downpipes
- Looking inside the roof cavity for signs of leaks or damage
The inspection determines the scope of work needed and forms the basis of your quote. A detailed quote should list specific repairs, not just “roof restoration” as a single line item.
Step 2: Repairs Before Cleaning
Any structural repairs are done before the roof is cleaned. This includes:
- Replacing cracked or broken tiles - damaged tiles are swapped out for matching replacements
- Rebedding loose ridge caps - if caps have shifted or the mortar bed underneath has failed, they are lifted, re-bedded with fresh mortar and repositioned. This is quoted separately from the restoration, not included in it
- Valley repairs or replacement - rusty or damaged valley trays are replaced with new material
- Flashing repairs - damaged or deteriorated flashings around pipes, walls, and skylights are repaired or replaced
- Gutter repairs - fixing any damaged sections, reattaching loose brackets
Getting repairs done first ensures that the cleaning process doesn’t worsen existing damage.
Step 3: High-Pressure Cleaning
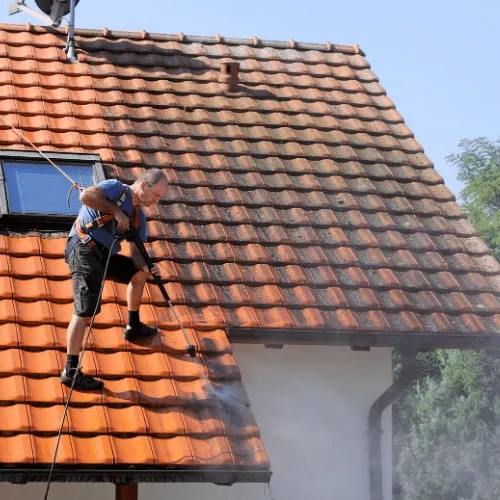
This is the most visually dramatic step. The entire roof surface is cleaned using commercial high-pressure water equipment - typically operating at 3,000-4,000 PSI.
The cleaning removes:
- Dirt and grime buildup
- Moss, lichen, and algae
- Old loose coating material
- Oxidation and surface contamination
- Anything that would prevent the new coating from bonding
What to expect during cleaning:
- It’s loud - commercial pressure washers are noisy
- It’s messy - black water and debris will wash off the roof and down the walls (this is cleaned up)
- It takes several hours for a typical home
- The roof will look surprisingly different - often much lighter in colour - once the grime is removed
The cleaned surface needs to dry completely before coating. In Perth’s climate, this usually takes 24-48 hours depending on the time of year.
Step 4: Repointing Ridge Capping
With the roof clean, the pointing work can proceed on a clean, dry surface:
- All old, cracked, or failed pointing is removed
- Any bedding repairs that weren’t done earlier are completed
- New flexible pointing compound is applied along both edges of every ridge cap
- The pointing is tooled to a neat finish and colour-matched to the roof
This step is crucial - even the best roof coating won’t prevent leaks if the pointing is compromised. Every millimetre of ridge line gets attention.
Step 5: Primer/Sealer Application
Before the main coating goes on, the entire roof surface receives a primer or sealer coat. This serves several purposes:
- Adhesion - creates a bond between the old surface and the new coating
- Sealing - fills the pores of concrete tiles, preventing the topcoat from being absorbed
- Uniformity - creates a consistent base for the topcoat colour
- Durability - the coating system is only as strong as its bond to the substrate
On concrete tiles, the primer is typically a penetrating sealer. On metal roofs, an etching primer or adhesion promoter is used.
The primer needs to dry before topcoats are applied - usually overnight in Perth conditions.
Step 6: First Membrane/Topcoat
The first coat of the main roof coating is applied. For premium restorations, this is typically a thick, flexible membrane coating (like Dulux Acratex) rather than a thin paint.
Application methods:
- Airless spray - the most common method for large roof areas. It applies an even, consistent coat quickly and efficiently.
- Roller - used for smaller areas, edges, and touch-ups where spray can’t reach
- Brush - for detail areas around flashings, edges, and tight spots
The first coat provides the primary protective layer and colour. It needs to dry before the second coat - typically overnight.
Step 7: Second Membrane/Topcoat
The second coat doubles the protection and evens out the colour. Two coats ensure:
- No thin spots where a single coat might not provide adequate coverage
- Consistent colour and finish across the entire roof
- Maximum durability and weather resistance
- The specified dry film thickness is achieved
After the second coat, the coating needs 24-48 hours to cure fully before foot traffic.
Step 8: Clean-Up and Final Inspection
Once the coating has cured, the crew returns for clean-up and final inspection:
- Remove any paint overspray from gutters, walls, or surfaces
- Clean up the work area at ground level
- Walk the finished roof for quality inspection
- Check that all repairs are complete and coating is consistent
- Document the finished work with photographs
The Complete Timeline
For a typical Perth home, the full restoration process takes 3-5 working days, spread over about a week to allow for drying time between steps:
| Day | Work |
|---|---|
| Day 1 | Repairs and preparation (plus rebedding, if separately quoted) |
| Day 2 | High-pressure cleaning |
| Day 3 | Repointing + primer (after drying) |
| Day 4 | First topcoat |
| Day 5 | Second topcoat + clean-up |
Weather can extend this timeline. Rain delays coating work because the surface must be dry. Most Perth restorations are scheduled during the drier months (October-April) for this reason.
Red Flags: Signs of a Rush Job
Knowing the proper process helps you spot operators who cut corners:
- No high-pressure clean - painting over a dirty roof guarantees early failure
- No primer - the topcoat won’t bond properly without it
- Only one topcoat - coverage and durability are compromised
- No repointing - leaving failed pointing means the roof will still leak
- Painting over broken tiles - painting doesn’t fix structural damage
- No drying time between coats - coats applied too quickly can trap moisture and fail
What to Ask When Getting Quotes
Armed with this knowledge, here are the key questions to ask any roofer quoting a restoration:
- What specific repairs are included?
- What pressure will you clean at?
- What primer/sealer product will you use?
- What topcoat product and how many coats?
- Is repointing included? Full or partial?
- What warranty do you offer on the work?
- What warranty does the coating manufacturer offer?
The answers will tell you whether you’re getting a proper restoration or a quick paint job. When you’re ready, you can request a quote and we’ll walk you through each step for your roof.
Related: How long does a roof restoration take? A day-by-day timeline
 Licensed
  Fast Response
