5 min read
Many Perth homeowners have never had their roof professionally inspected. They assume everything’s fine because there are no leaks - until one day there is, and the damage has been building for years.
A professional roof inspection takes about an hour and gives you a complete picture of your roof’s condition. Here’s what happens during one.
Before Climbing Up
A good inspection starts on the ground. Before anyone gets on the roof, the inspector will:
- Walk the perimeter of your home looking up at the roof from all angles
- Check for visible damage from ground level - missing tiles, sagging ridge caps, damaged gutters
- Note the roof type and approximate age to set expectations
- Identify access points and assess safety requirements
- Ask about any known issues - leaks, previous repairs, problem areas
This ground-level assessment often reveals issues that aren’t visible from above, like staining on fascia boards or displaced tiles on the lower courses.
On the Roof: What Gets Checked
Tiles or Sheeting
The inspector will examine the roof surface systematically, typically working from one end to the other:
- Cracked, broken, or chipped tiles - even hairline cracks can let water through
- Slipped tiles that have moved off their battens
- Loose or lifted tiles that could lift further in wind
- Surface condition of the coating - fading, chalking, peeling
- Moss, lichen, or algae growth and how extensive it is
- On metal roofs: rust spots, lifted screws, dents, scratched or damaged paint
Ridge Capping
The ridge is one of the most common failure points on Perth roofs:
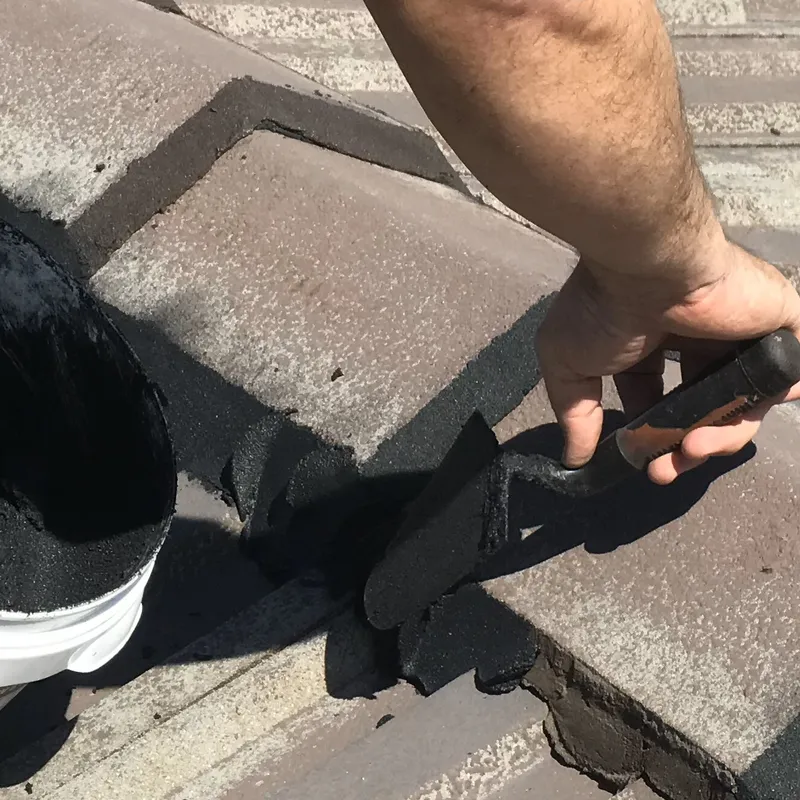
- Condition of the pointing - cracked, crumbling, or missing
- Bedding integrity - is the mortar bed underneath still sound?
- Ridge cap alignment - have any caps shifted or lifted?
- Gaps between caps that could allow water entry
Valleys
Valleys carry concentrated water flow and are a critical inspection area:
- Rust on metal valley trays - particularly at the base where water flows most
- Debris buildup in the valley channel
- Gaps between tiles and valley tray where water could bypass
- Flashing condition at the top and bottom of each valley
Flashings
Every roof penetration has flashings that need inspection:
- Pipe flashings - rubber boots around vent pipes can crack with age
- Wall flashings - where the roof meets a wall (e.g., second-storey walls)
- Skylight flashings - seals around skylight frames
- Antenna and aerial mounts - fixings that penetrate the roof surface
- Air conditioning pipe penetrations
Gutters and Downpipes
While not technically “the roof,” gutters are always checked:
- Debris and blockages
- Rust or corrosion
- Sagging or pulling away from fascia
- Downpipe connections and flow
- Brackets and fixings
Inside the Roof Cavity
A thorough inspection includes a look inside the roof space. This is where hidden problems show up:
- Water stains on timber indicating past or present leaks
- Daylight visible through the roof showing gaps or damage
- Mould or mildew on timber framing
- Condition of insulation - wet, compressed, or displaced insulation
- Signs of pest activity - possum droppings, bird nests, wasp nests
- Timber condition - checking for rot, termite damage, or structural issues
- Ventilation assessment - adequate airflow through the cavity
The Inspection Report
After the inspection, you should receive a clear report covering:
- Overall condition rating of the roof
- Specific issues identified with location and severity
- Photographs of problem areas
- Recommended actions - what needs immediate attention vs. what can wait
- Estimated remaining life of the roof in its current condition
- Approximate costs for recommended repairs or restoration
A good report doesn’t just list problems - it prioritises them so you know what to address first and what can be monitored.
What the Results Mean
”Good condition - minor maintenance recommended”
Your roof is in solid shape. There may be a few tiles to replace, some pointing to touch up, or gutters to clean, but nothing urgent. Schedule the minor work at your convenience and plan for a check-up in 2-3 years.
”Fair condition - repairs needed within 12 months”
There are issues that aren’t causing problems yet but will if left unaddressed. Cracked pointing, deteriorating valleys, or failing flashings fall into this category. Getting these fixed now prevents more expensive problems later.
”Poor condition - immediate attention required”
Significant damage or deterioration that’s either already causing problems (leaks, structural concerns) or will very soon. This might mean a full restoration, valley replacements, or extensive repointing. Don’t delay - the cost of waiting only increases.
”End of life - replacement recommended”
The roof has reached the end of its serviceable life. Restoration may not be economical because the substrate (tiles or sheeting) is too deteriorated to coat effectively. A replacement is the most cost-effective long-term option.
How Often Should You Get an Inspection?
For Perth homes, a professional roof inspection is recommended:
- Every 2-3 years for roofs over 15 years old
- Every 5 years for newer roofs in good condition
- After significant storms with hail or strong winds
- Before buying a property (pre-purchase inspection)
- Before selling to identify and address issues proactively
Many roof problems develop gradually. Regular inspections catch them while they’re small and affordable to fix, rather than waiting until you’re dealing with leaks and damage.
What It Costs
Most Perth roofing companies offer free or low-cost initial inspections, particularly when they’re quoting on potential work. A standalone, detailed inspection report typically costs $150-$300 depending on the size and complexity of the roof.
Given that a single undetected leak can cause thousands of dollars in ceiling, insulation, and timber damage, an inspection is one of the best-value investments you can make in your home. If you’d like your roof assessed, request a quote and we’ll arrange a time.
 Licensed
  Fast Response
